Sunday, February 19, 2012

7 things Sunday

Photobucket
7 things I've done this week -
  1. Watched epic Valentine's Day hustling go down in the Grade 5 class I am in.
  2. Kept time for the lane one swimmer's for the interhouse junior school gala. WOW. Some mothers. NEED to calm down. it is NOT the olympics. I promise.
  3. Went go-carting with my dad and brother. fun.
  4. Skipped gym in favour of an afternoon nap. awful. wonderful.
  5. Had delicious Sunday Morning scrambled eggs with my family made by my lovely brother.
  6. Collected my new driver's licence and passport. Im now a real person again.
  7. Yawned. a lot.
Photobucket
Photobucket

Friday, February 17, 2012

left behind.

Before I left Korea, I hauled out a few old canvases that were hiding in the back of my drawers. There were three long canvases that I smashed together to make a big picture. I decided to do a little bit of fun-canvas-mash-up for my friend Angie from Canada who has recently built her own house. I met Angie in Korea - when we were both teaching english at the Gyeonggi English Village in Paju -

Photobucket

First I penciled in an outline and then taped roughly around the outline so that I could paint the canvases and peel off the tape at a later stage:

Photobucket

Paint. Because who doesn't love paint?

Photobucket


Painting in progress {below}:
(i recommend doing this on a cold day, with good tunes a-going and red wine in hand.)

Photobucket

I wanted to make a rough super-textured collage-type canvas set, so i printed out some pictures of our fun times in Korea together, a short poem Angie had written as a grade 2 pupil and I collected a few other bits and pieces like fabric scraps, doilies, stamps, Korean money, newspaper clippings and photographs.

Photobucket
Photobucket
Photobucket

After I had filled the canvas and modge-podged everything that I wanted onto it - with different layers and textures I peeled off the tape to leave a neat unpainted line of peace-dove.

And here's the kicker: I was so rushed when I got back to Korea from our Asian back-packing extravaganza at the end of last year that I didn't have time to mail the finished canvases to Angie in Canada and my bags were way too overweight to pack them... 

so they are stuck in SoKo.

Photobucket

Let's just say it's "a small piece of Angie and Che will be left in Asia forever"

yes.
:)

Thursday, February 16, 2012

Sol

Was looking few a few old photo-folders on my computer and found these pics of one of my favourite little -people from Korea - lovely little Sol. I snapped these pics of the cute card and origami Hanbok she made for me when I left Korea.

Photobucket
Photobucket
Photobucket
Photobucket
The last colouring-in page was made off the Crayola website. Precious.

These coupons are awesome to help you save on some more craft ideas!

Tuesday, February 14, 2012

lovely day

Today I'm teaching sub-atomic matter to ten year olds... Happy VALENTINE'S DAY ME!!
and to all of you... I hope you have a very Happy Day of Love. Hearts for all!
Photobucket
Pic taken in Bath on an ultra-wide angle slim film camera.


Monday, February 13, 2012

re-acclimatisation

Since being back in South Africa there have been a few things I've needed to deal with - two of which are applying for a new passport (mine is full), and re-newing the driver's license (mine has expired). Any one who lives in South Africa will know that visiting the home affairs office/ traffic department may be likened to a Shakespearian tragedy - long, complex and usually resulting in a painful death. My lovely dad drove me to the traffic department last week. (obviously he drove me - my license has expired. keep up.) Re-newing your driver's license involves fingerprinting and eye tests. So off I went to take the eye test -

Guy administering eye-test seems very bored with his job:
Photobucket
Photobucket

yes.

Photobucket
Photobucket
Photobucket
Photobucket
Photobucket

Photobucket
Photobucket
Photobucket
Photobucket
Photobucket
Photobucket
Photobucket
Photobucket
Photobucket
Photobucket
Photobucket
Photobucket
Photobucket
Photobucket
Photobucket
Photobucket
Photobucket
Photobucket
Photobucket

* long pause *
Photobucket
Photobucket

* * * * * 

Me: No, guy, it's really not funny.
Traffic Man: HA HA HA! it's TOO funny! i joke! i joke!
Me: i thought i was blind.
Traffic Man: haha haha!! puppies!! haha!!

*silence*

Traffic Man: Ok. Ok, your eyes are fine.  Now, you will need to come in next week to re-take your driving test.

Me: WHAT?!


Traffic Man: Ha ha ha! ...... it's too easy!


* * * * *
That guy. What a jokester.
Africa, it is good to be home.

Sunday, February 12, 2012

7 things Sunday

Photobucket
  1. Sometimes boys are better at thinking up date ideas than girls.
  2. Always put down plastic sheeting when you decide to paint something. ALWAYS.
  3. Coffee in bed is the loveliest treat.
  4. Sometimes you need to take a little step back and re-evaluate everything.
  5. Getting your hands dirty (full of paint, glue, wood-filings etc) can be very rewarding.
  6. It takes a small act to make the heart of a small child happy.
  7. New music is always good for the soul.

Friday, February 10, 2012

mapped flowers

On Tuesday I posted about some gift wrap that I made for a 40th birthday present which included handmade map and newspaper roses. Here's how to make them - super quick and easy.
Photobucket
Things you need:

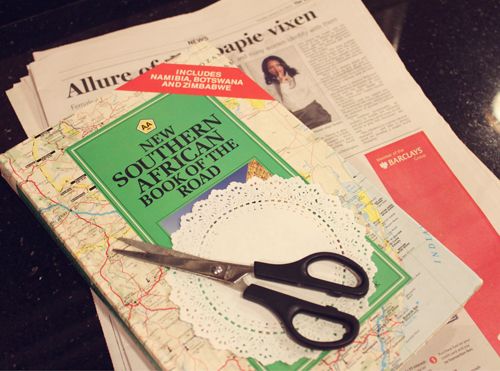
  • An old map book (you can get these from flea markets or second hand bookstores)
  • Old newspapers
  • Scissors
  • Split pin
  • Water (and ideally in a spray bottle - but not essential)
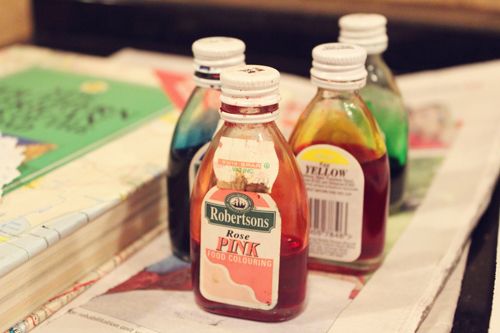
  • Food colouring
  • Paintbrush
  • An oven.

Photobucket

(This is the food colouring I used. You can tell how old it is by the fact that it costs R2,79)
Photobucket

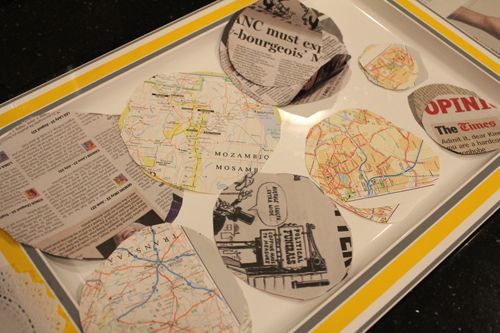
Step One:
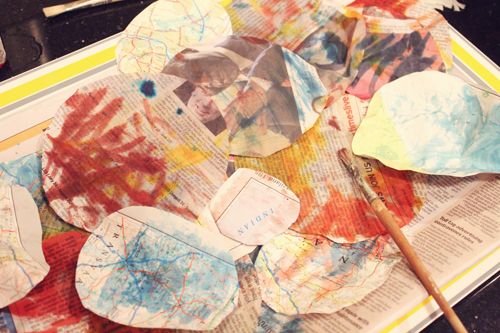
Cut out a variety of circle shapes. (You don't need to measure them and they definitely don't need to be perfect circles). You should aim for a variety of sizes with the largest one being roughly the size you would like your flower to be. (It is also good idea to have a mixture of circles from both map books and newspapers - the maps are slightly heavier and are good for holding the flowers securely.)
Photobucket

Step Two:
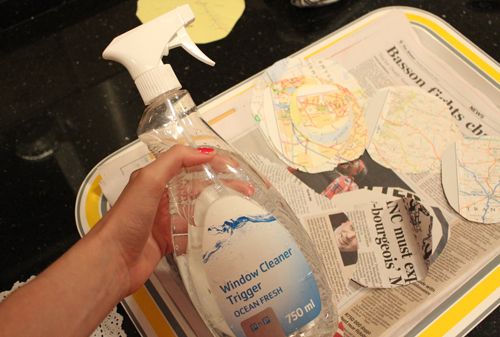
Once you have cut out your circles you can lay them on a tray and spray them with water. (I put my water into an old window cleaner bottle to make it easier). Make sure that they are damp but not soaking.
Photobucket

Step Three:
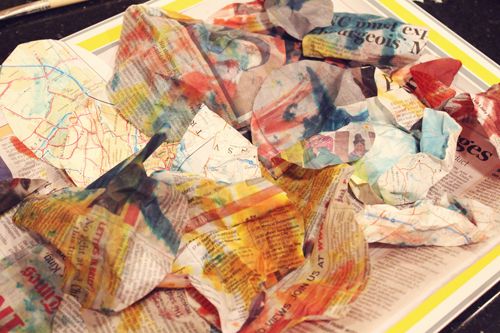
Use your paintbrush to swab a whole bunch of colours over your newspapers and maps. Don't worry about covering every inch. Random, streaky lines are perfect and it's good to get some of the newspaper showing through for an extra layer of texture.
Photobucket

Step Four
Once your papers are covered in food-colouring streaks and slightly damp (re-spray them if needed) scrunch them into loose balls so that they are no longer flat. (as in above)

Photobucket

(At this point, whilst working in the kitchen, during the "experimental-flower-production-line" I was thinking out loud, "mmm.... i feel like I want to put these in the oven...." Now anyone who knows my cooking track record will know that 'che' and 'oven' are not words that should ever exist in the same sentence.
Anyway, my lovely dad who was watching in curiosity at this whole process that was taking place before him exclaimed: YES! i think that's a GREAT idea!
me: seriously?
dad: yes! seriously. it'll be good!
me: you're really going to let me use the oven?
dad: yeah- I mean.. I'm sitting right here, what could possibly go wrong?

Bless my dad and his enthusiasm for my random craft ideas.)

Step Five
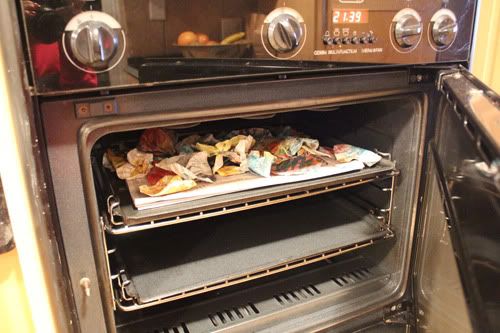
Put the papers into the oven. Make sure you have it on a very low heat and leave the oven door open slightly. Also keep your beady eye on it at all times.

ALSO: -

Do not put the plastic tray into the oven.

Dad: CHE!! WHAT ARE YOU DOING?! YOU CAN'T PUT THAT IN THE OVEN!
Che: geeez. dad! you can't let me use the oven and then not supervise!

Anyway,

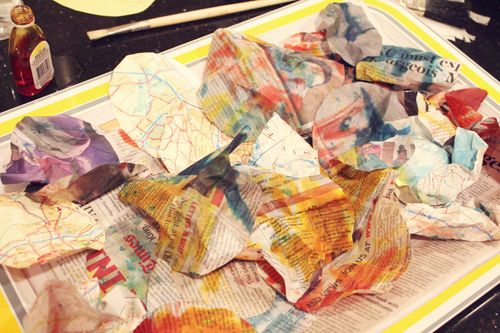
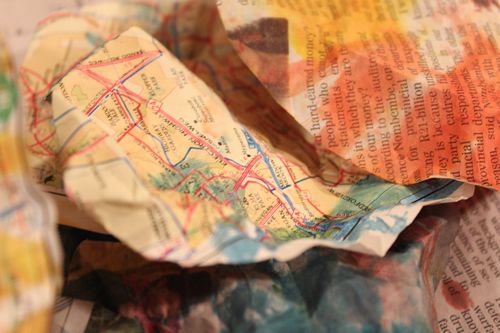
You should keep the papers in the oven (no plastic tray) until they go slightly firm and crunchy. Don't let them burn or get too brittle in the oven- you should be able to bend them without them losing their shape or breaking.
Photobucket
Photobucket
The papers will go slightly browned/aged and be slightly firmer.

Step Six:
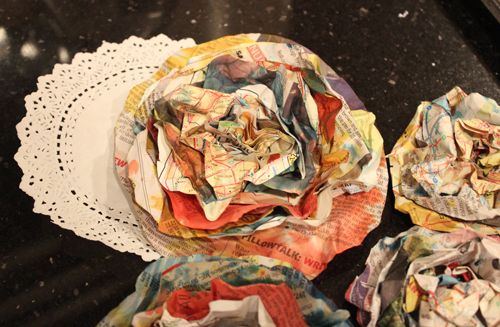
Once you have all your circles dried in the oven - you can layer them on top of one another starting with the smallest one on top and getting consecutively bigger as you go on. Secure the circles with a split pin or two. I found it easier to push the split pin through one page at a time rather than try to secure the whole stack at once. 
Once each circle is on you can bend/crunch up the outside of the circle towards the middle to make it look like it is budding - (You can also secure the final layer onto a doily if you wish.)
Photobucket

Step Seven:
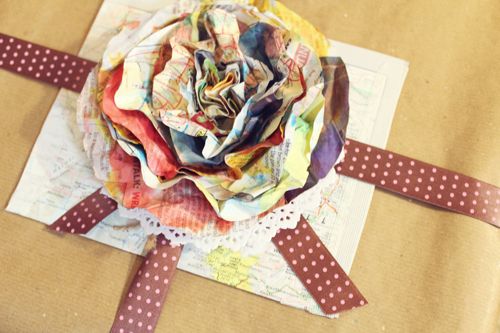
Attach your pretty flower to a plainly wrapped gift. et voila!
Photobucket