
On Tuesday I posted about some gift wrap that I made for a 40th birthday present which included handmade map and newspaper roses. Here's how to make them - super quick and easy.
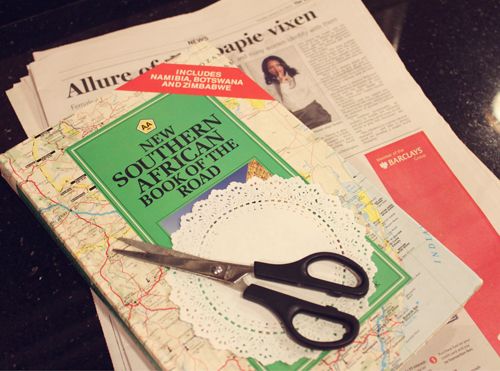
Things you need:
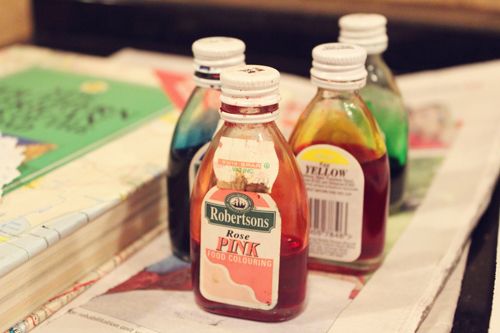
(This is the food colouring I used. You can tell how old it is by the fact that it costs R2,79)
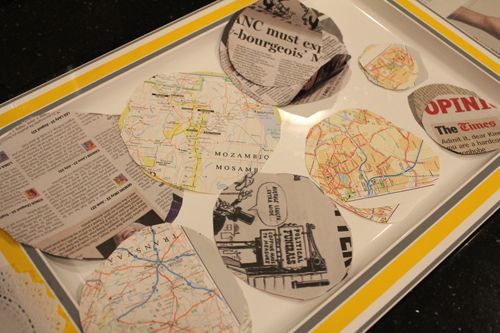
Step One:
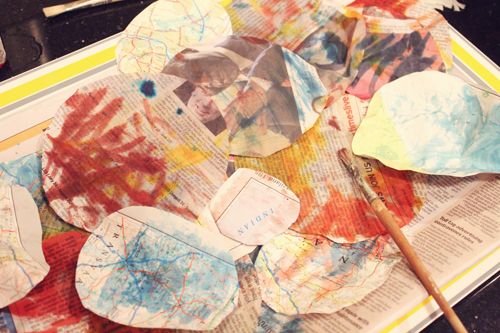
Cut out a variety of circle shapes. (You don't need to measure them and they definitely don't need to be perfect circles). You should aim for a variety of sizes with the largest one being roughly the size you would like your flower to be. (It is also good idea to have a mixture of circles from both map books and newspapers - the maps are slightly heavier and are good for holding the flowers securely.)
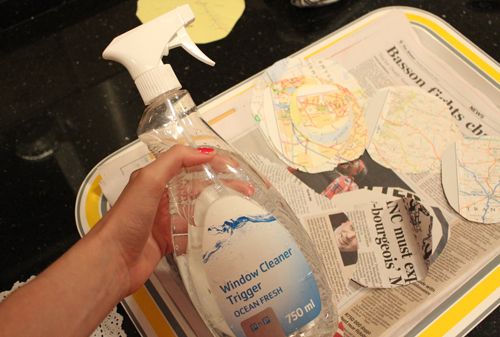
Step Two:
Once you have cut out your circles you can lay them on a tray and spray them with water. (I put my water into an old window cleaner bottle to make it easier). Make sure that they are damp but not soaking.
Step Three:
Use your paintbrush to swab a whole bunch of colours over your newspapers and maps. Don't worry about covering every inch. Random, streaky lines are perfect and it's good to get some of the newspaper showing through for an extra layer of texture.
Step Four
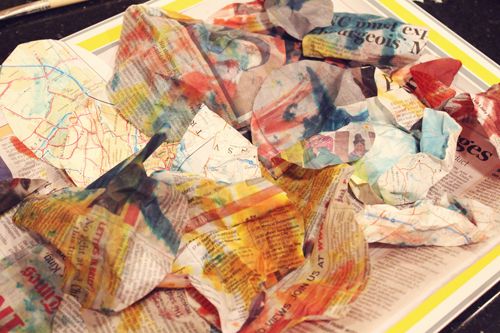
Once your papers are covered in food-colouring streaks and slightly damp (re-spray them if needed) scrunch them into loose balls so that they are no longer flat. (as in above)
(At this point, whilst working in the kitchen, during the "experimental-flower-production-line" I was thinking out loud, "mmm.... i feel like I want to put these in the oven...." Now anyone who knows my cooking track record will know that 'che' and 'oven' are not words that should ever exist in the same sentence.
Anyway, my lovely dad who was watching in curiosity at this whole process that was taking place before him exclaimed: YES! i think that's a GREAT idea!
me: seriously?
dad: yes! seriously. it'll be good!
me: you're really going to let me use the oven?
dad: yeah- I mean.. I'm sitting right here, what could possibly go wrong?
Bless my dad and his enthusiasm for my random craft ideas.)
Step Five
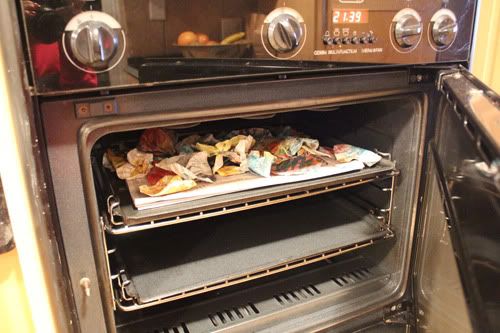
Put the papers into the oven. Make sure you have it on a very low heat and leave the oven door open slightly. Also keep your beady eye on it at all times.
ALSO: -
Do not put the plastic tray into the oven.
Dad: CHE!! WHAT ARE YOU DOING?! YOU CAN'T PUT THAT IN THE OVEN!
Che: geeez. dad! you can't let me use the oven and then not supervise!
Anyway,
You should keep the papers in the oven (no plastic tray) until they go slightly firm and crunchy. Don't let them burn or get too brittle in the oven- you should be able to bend them without them losing their shape or breaking.
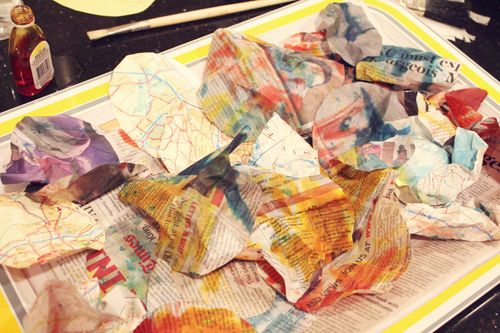
The papers will go slightly browned/aged and be slightly firmer.
Step Six:
Step Seven:
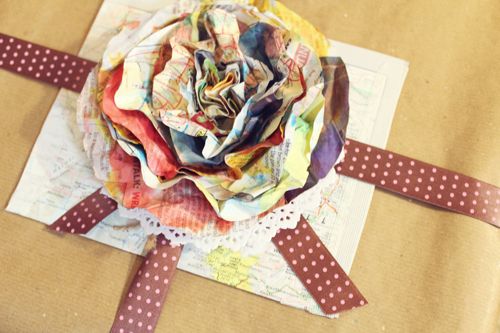
Attach your pretty flower to a plainly wrapped gift. et voila!

Things you need:
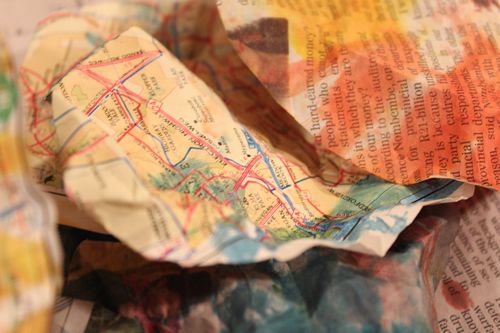
- An old map book (you can get these from flea markets or second hand bookstores)
- Old newspapers
- Scissors
- Split pin
- Water (and ideally in a spray bottle - but not essential)
- Food colouring
- Paintbrush
- An oven.

(This is the food colouring I used. You can tell how old it is by the fact that it costs R2,79)

Step One:
Cut out a variety of circle shapes. (You don't need to measure them and they definitely don't need to be perfect circles). You should aim for a variety of sizes with the largest one being roughly the size you would like your flower to be. (It is also good idea to have a mixture of circles from both map books and newspapers - the maps are slightly heavier and are good for holding the flowers securely.)

Step Two:
Once you have cut out your circles you can lay them on a tray and spray them with water. (I put my water into an old window cleaner bottle to make it easier). Make sure that they are damp but not soaking.

Step Three:
Use your paintbrush to swab a whole bunch of colours over your newspapers and maps. Don't worry about covering every inch. Random, streaky lines are perfect and it's good to get some of the newspaper showing through for an extra layer of texture.

Step Four
Once your papers are covered in food-colouring streaks and slightly damp (re-spray them if needed) scrunch them into loose balls so that they are no longer flat. (as in above)

(At this point, whilst working in the kitchen, during the "experimental-flower-production-line" I was thinking out loud, "mmm.... i feel like I want to put these in the oven...." Now anyone who knows my cooking track record will know that 'che' and 'oven' are not words that should ever exist in the same sentence.
Anyway, my lovely dad who was watching in curiosity at this whole process that was taking place before him exclaimed: YES! i think that's a GREAT idea!
me: seriously?
dad: yes! seriously. it'll be good!
me: you're really going to let me use the oven?
dad: yeah- I mean.. I'm sitting right here, what could possibly go wrong?
Bless my dad and his enthusiasm for my random craft ideas.)
Step Five
Put the papers into the oven. Make sure you have it on a very low heat and leave the oven door open slightly. Also keep your beady eye on it at all times.
ALSO: -
Do not put the plastic tray into the oven.
Dad: CHE!! WHAT ARE YOU DOING?! YOU CAN'T PUT THAT IN THE OVEN!
Che: geeez. dad! you can't let me use the oven and then not supervise!
Anyway,
You should keep the papers in the oven (no plastic tray) until they go slightly firm and crunchy. Don't let them burn or get too brittle in the oven- you should be able to bend them without them losing their shape or breaking.


The papers will go slightly browned/aged and be slightly firmer.
Step Six:
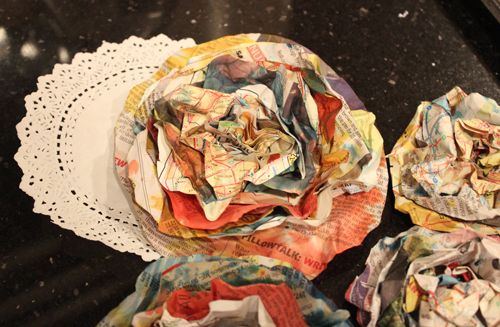
Once you have all your circles dried in the oven - you can layer them on top of one another starting with the smallest one on top and getting consecutively bigger as you go on. Secure the circles with a split pin or two. I found it easier to push the split pin through one page at a time rather than try to secure the whole stack at once.
Once each circle is on you can bend/crunch up the outside of the circle towards the middle to make it look like it is budding - (You can also secure the final layer onto a doily if you wish.)

Step Seven:
Attach your pretty flower to a plainly wrapped gift. et voila!

1 comment :
YAY!!!!!! THANK YOU Sooooooo much!! This is so awesome - cant wait to try it!
Post a Comment