

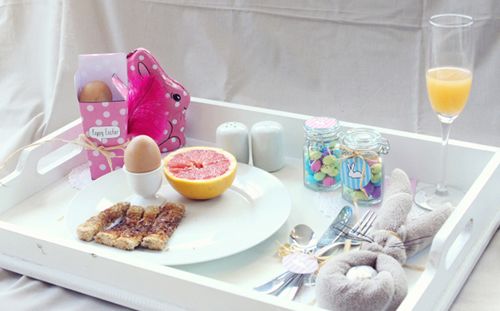
There isn't a better way to be woken up on Easter morning than with a delicious breakfast in bed - complete
with eggs of all kinds. This printable DIY is perfect for sprucing up your breakfast tray for someone special.
Easter box how to:
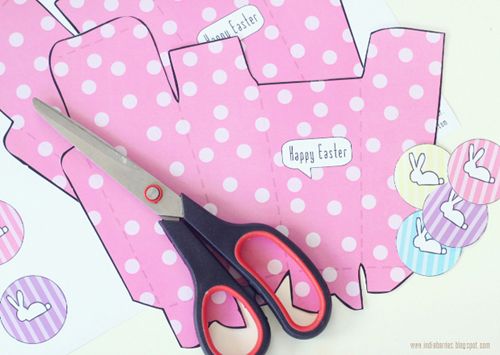
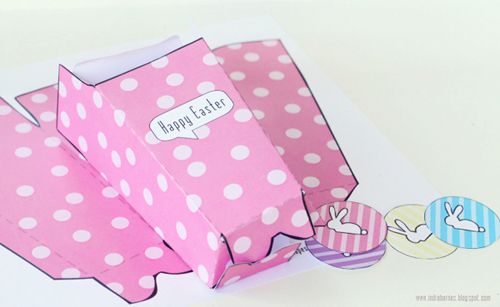
To make the Easter box, print the DIY page on card and once you have cut out the box shape, carefully fold it up along the lines and glue the flaps down. The bottom flaps are designed to link into each other as you can see in the above picture. Make sure the flaps have dried before you try and put anything in the box. Once the box is assembled you can fill it with some sweet chocolate mini eggs and tie a bright pink feather to it using some rafia or brown string if you have any.
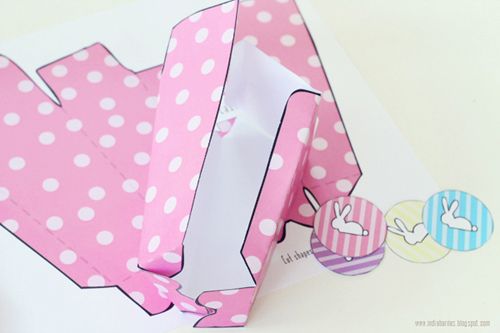

If you're going with the healthy option, instead of chocolate mini eggs you could put a boiled egg into the
box to accompany your breakfast feast. (But who doesn't mind a bit of extra chocolate on Easter, right?)

I bought some small glass jars to fill with mini chocolate eggs. I tied the circle bunny tags, which you can find on the printable page, to the jars using rafia to put onto the breakfast tray. These little sweetie-jars also make great and inexpensive Easter gifts and you could write a name or little note on the back of these tags. I really loved the pastel colours of the chocolate mini eggs, but you could also use smarties, small wrapped Easter eggs or any other sweets you like.


Once you've made all your Easter goodies, lay it out onto a big breakfast tray - don't forget your condiments and cutlery - which look really pretty tied with a matching circle tag. If you don't grubby paws all over your bed you could make a cute Easter bunny using a serviette or a tea-towel.


To make the Easter Bunny serviette:
1. Take a clean serviette or tea towel and roll it up diagonally. (bunny-coloured is best!)
2. Fold the tea towel in half.
2. Fold the tea towel in half.
3. Place a big shiny Easter egg in the towel fold.
4. Tie an elastic band around the tea-towel to keep the egg in place and create the bunny-belly.
5. Tie another elastic band a little higher up to create the bunny face.
6. Use rafia to cover the elastic bands and then cut three equal lengths of scooby-wire (or pipe-cleaners) and lay them onto the bunny's face to make whiskers. Thread another piece of wire or pipe-cleaner through the tea-towel to secure them and then separate them into bunny whiskers.
6. Use rafia to cover the elastic bands and then cut three equal lengths of scooby-wire (or pipe-cleaners) and lay them onto the bunny's face to make whiskers. Thread another piece of wire or pipe-cleaner through the tea-towel to secure them and then separate them into bunny whiskers.


You can download the .jpg printable here.
If you'd prefer the PDF version - mail me :)
Bon apetit and Happy Easter!
11 comments :
love the little jars, where did you get those from?
I got mine from The Crazy Store but you should be able to find a similar kind of thing at any Checkers/Pick n Pay type store or somewhere that stocks Consol products. Hope you find some! :)
so cute man :)
Love the little jars too! Definitely will go look for some.
If you're in Joburg, Flower Spot in Woodmead has them in all shapes and sizes
thanks hun! what a cute little treat!
Lovin the bunny napkins!
Love it! The easter bunner serviette is awesome
Thank you! I just made the easter egg box & have filled it with my favourite sweets for my love :) YAY!
oh YAY!!! :) I'd love to see a pic if you have one! :)
I will send one soon :) And post this on my blog & link back to your blog if you don't mind?
Post a Comment